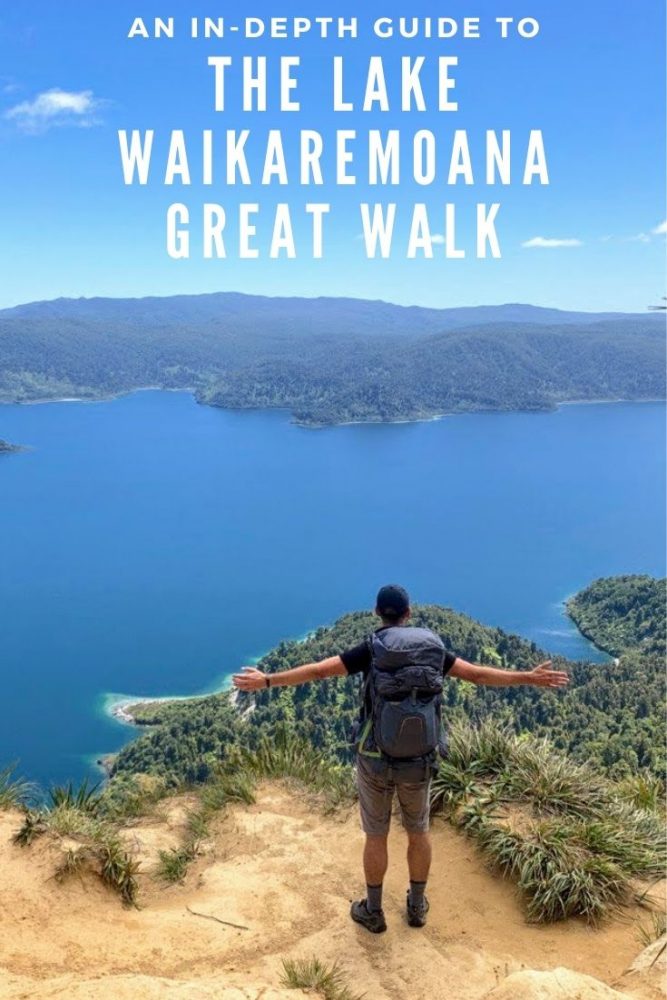
A Guide to New Zealand’s Lake Waikaremoana Great Walk
Articles on this site contain affiliate links, meaning I may be compensated if you buy a product or service after clicking them. The full privacy & disclosure policy is here.Nestled at the bottom of Te Urewera, a former national park in a remote part of New Zealand’s North Island that’s now its own legal entity, lies Lake Waikaremoana. Managed by the Tūhoe tribal authority and surrounded by prehistoric forest, it’s a popular area for hunting, fishing, and most interestingly for me, hiking.
I’d visited the lake once before, nearly a decade earlier, but only for a couple of nights enroute to Napier. This time I was there for a much better reason: tackling the multi-day Lake Waikaremoana Track.
Despite being one of New Zealand’s ten Great Walks, it isn’t a particularly popular track. Especially compared to routes like the Milford, Kepler, and Abel Tasman, the Lake Waikaremoana track is largely peaceful, sedate, and empty even at peak times. The remote location deters almost all day hikers, and Lauren and I often found ourselves sharing the track with only the birds.
I’ve broken this post up into two main sections, covering planning and logistics, and the walk itself. If you’re preparing for your own Lake Waikaremoana walk and want to know things like how to get to and from the track, difficulty level, water taxi information, what the huts are like, the things you need to take, and so on, read the first part.
If you prefer pretty photos, or want a route summary, daily distances, or a blow-by-blow description of the walk, check out the second section.
Or just read it all!
Where Does It Start and Finish?
Surprisingly enough, the walking route largely follows the shoreline of Lake Waikaremoana. It’s not a circuit, however, so you have to make a choice about where you’re going to start.
The majority of people walk in a clockwise direction, starting at Onepoto at the bottom (south) of the lake and finishing at Hopuruahine Landing in the north.
Just off the main road (SH38) and around 20 minutes south of the vistor centre and holiday park at Te Karetu, Onepoto has a fairly large carpark where you can leave your vehicle while you walk.
If you choose to leave your car at the other end, be aware that the carpark there is smaller, less-used, and at two kilometres from the road, more isolated. I’m not saying your vehicle will get broken into, but I’m not not saying it either. Hopuruahine Landing is around a half-hour drive from Te Karetu.
If you don’t happen to have someone available to pick you up at the other end, you’ll either need to take the water taxi (discussed below) or spend a few days walking back to the start.
Of course you don’t have to start walking from the same place you leave your car. There can be benefits to parking at one end, taking the water taxi or getting a lift to the other, and walking back to your vehicle: to start with, it provides more flexibility about when you finish on your final day.
One thing to note is that there’s minimal cell phone reception, especially with Spark, around the track. You’ll likely have coverage at Onepoto carpark and on the walk up to Panekire Hut, but it disappears soon after that. Plan to be offline for most of the walk.
How Long Is It?
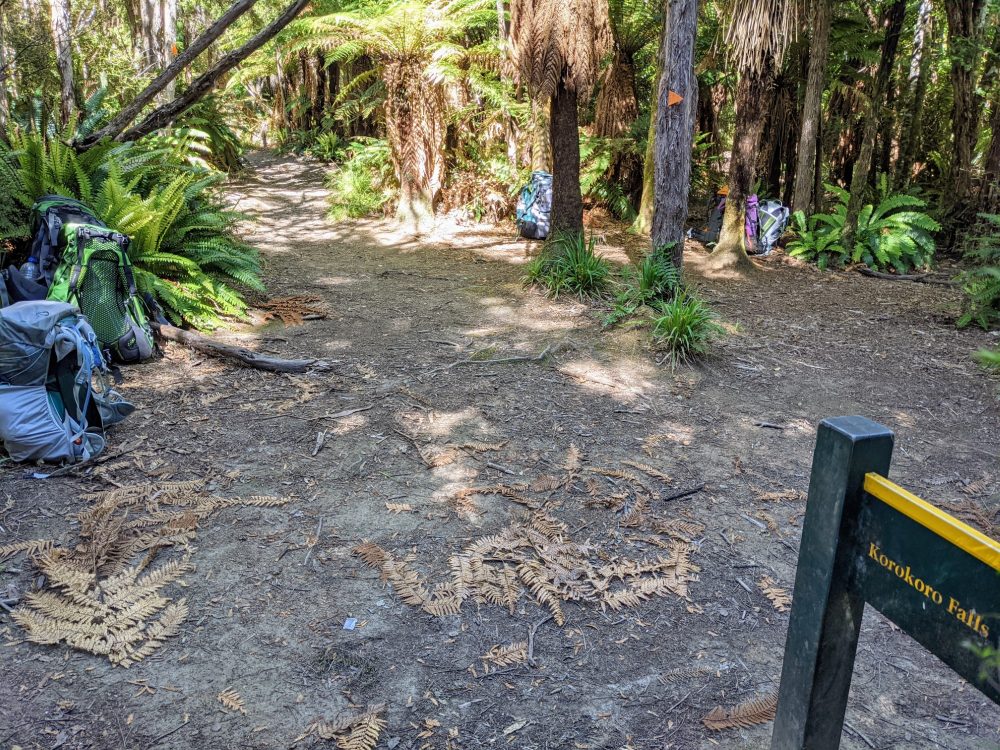
The walk runs for a total of 46km from Onepoto to Hopuruahine Landing, not including the (very worthwhile) side track to Korokoro Falls that adds about 4km return.
If you’re getting picked up or dropped off by water taxi at the northern end, you’ll likely walk a little less distance: due to shallow water, the boat stops at a signposted beach just south of Whanganui Hut rather than at Hopuruahine Landing.
This cuts out around 4km, although of course you can always walk to the end and back if you’re a completionist.
How Long Does It Take to Walk?
You can take pretty much as long as you like to walk the Lake Waikaremoana Great Walk, subject only to hut availability. There are five huts and five campsites along the track, and you’re even able to book the same place for multiple nights if you want to have rest days.
The Department of Conservation site suggests taking four days/three nights to walk the track, and that’s what we went with. It felt like the right amount of time, giving us 4-5 hours of walking each day including the side track to Korokoro Falls, and time at the end of day two and three to go for a swim in the lake.
If you’re fit and short on time, you could combine days one and two, taking you all the way to Waiopaoa Hut rather than staying in Panekire Hut at the top of the mountain. That would make for a long, hard day, going from around 650m above sea level to 1100m and back again over the course of 17km, but it’s do-able in good weather.
Which Direction Should I Walk?
We booked our huts for a clockwise walk, and then started hearing horror stories from a few people about the difficulty of the first day spent climbing several hundred metres up the Panekire Range with a pack full of food and water.
As a result, we considered swapping the direction, but because the huts have different capacities and were full by that point, it wasn’t possible. In the end, though, I’m glad we couldn’t make the change.
Despite all the stories, the climb from the start of the track to Panekire Hut on the first day wasn’t too bad. The track was fairly well-formed and usually not all that steep, and was largely shaded by tall trees in the forest. The lake views were amazing from the viewpoints dotted occasionally along the track, and gave a great excuse to stop and catch our breath for a while.
Getting the hardest part out of the way while we were still fresh made the rest of walk comparatively easy, with our packs getting lighter as we got more tired towards the end.
There’d be no problem walking anti-clockwise, of course, and we met several people doing just that. The overall challenge is about the same either way, so make your decision based more on hut availability and the logistics around water taxis and where you park your car than the perceived difficulty.
How Does the Lake Waikaremoana Water Taxi Work?
As with the track and accommodation itself, the Lake Waikaremoana water taxi is managed by Tūhoe. Operated by a local guy (Blair Waiwai), it runs six days a week during the Great Walk season, with no service on Sundays.
The taxi is a small boat that can hold around six passengers. The first run starts beside the holiday park at Te Karetu at 8 a.m. before heading to the track start/end points at Onepoto and Whananui.
The boat then departs as follows from Whananui to Onepoto:
- 9 a.m.
- 10 a.m. (continuing on to Te Karetu)
- 1:30 p.m
- 2:30 p.m.
- 3:30 p.m. (continuing on to Te Karetu)
The reverse route from Onepoto to Whananui departs at:
- 9:30 a.m.
- 2 p.m.
- 3 p.m.
You need to book in advance using the above link or by calling +64 21 594 374. A one-way fare is NZ$75, other than children 5 and under (NZ$25).
You can also arrange pickups and drop-offs at other waterside huts and campsites along the track. These start at 11:30am, and cost NZ$100 per adult, NZ$25 per child.
All water taxi bookings should be made well in advance, especially during peak times. The taxi will usually make extra trips if it needs to, but because it’s quite small, don’t expect to be able to just show up and get on straight away (or at all) if you haven’t booked.
There were nearly 20 people waiting for the taxi on the day we finished our walk, and those who hadn’t booked had to wait an extra two hours for a ride.
Weather is also a factor: if there are strong winds or other particularly bad weather on the lake, the water taxi can’t operate. It may just be delayed for a while, but can mean it won’t run at all until the following day. If you’re finishing at Whananui Hut, take enough food for an extra night just in case.
How Hard Is It?
If you have a reasonable degree of fitness and follow DOC’s recommendation of a four day/three night hike, I’d rate the hike as easy to moderate overall. That’s especially true if you’re staying in the huts rather than camping, and don’t have to carry the extra weight of a tent, sleeping mat, etc over the Panekire range.
The faster you try to complete the walk, the harder it becomes: I met a couple of young women who were attempting to do it in two days, and they both looked pretty tired at the end of the first one.
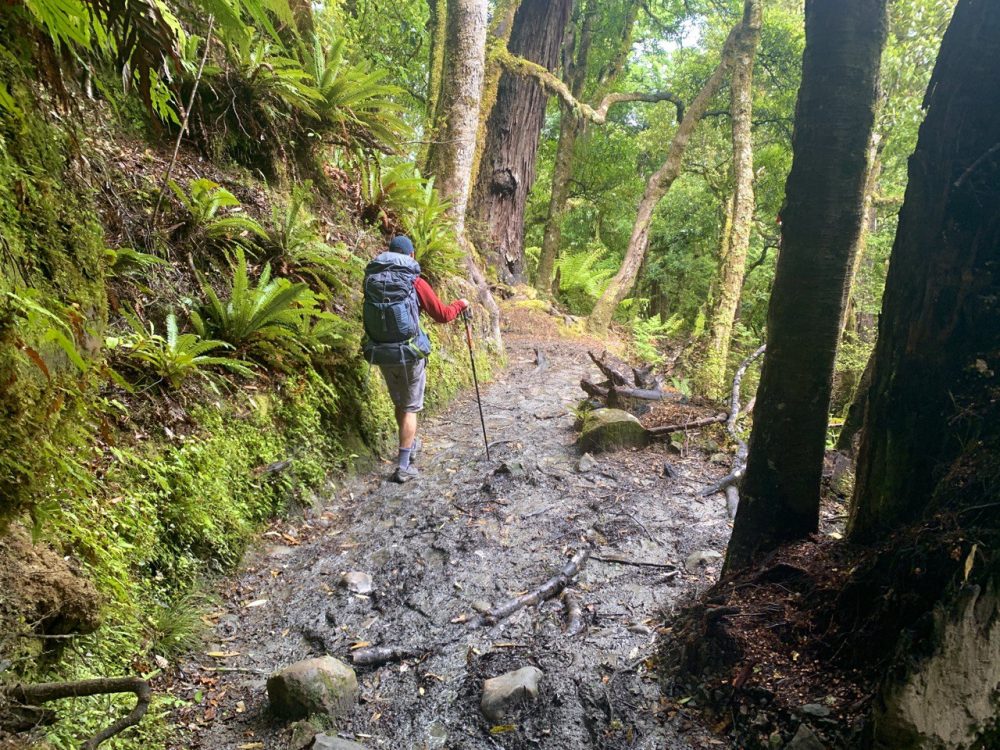
The track surface is generally pretty good. While there are a few rocks and tree roots to contend with, it’s nothing major, although things can get a bit slippery at times. Likewise, while there was some mud on lakeside sections of the track, it wasn’t all that frequent and didn’t get above ankle level. Of course, we had fantastic weather: the mud will be more of an issue after days of rain!
Looking at the elevation chart for the track, you’d be forgiven for thinking that the track is pretty flat other than that climb and descent over Panekire. While that’s true in relative terms, it probably won’t feel like it as you climb over the undulating ridgeline between Waiopaoa and Marauiti or Waiharuru huts!
We found the estimates for walking times on the DOC signs and brochures to be on the conservative side, but not always by a lot. I’d suggest using them as a rough guide unless you know you walk much faster or slower than other people.
If you end up with a bit of extra time at the end of the day, well, it’s a good excuse to laze around reading a book or go for a swim in the lake!
Getting To and From the Trail
Lake Waikaremoana is isolated, even by New Zealand standards. Tucked away towards the bottom of Te Urewera, there’s one road in and out, SH38. This road includes a 90km gravel section between Murupara and Tuai.
The bulk of the gravel lies to the northwest of Te Karetu, so if you’re coming from Rotorua or Taupo, expect a long, slow journey on a narrow, winding, and bumpy road. It’s not as bad coming from Wairoa in the south, but you’ll still encounter around 15km of continuous gravel plus several other smaller sections.
The road is maintained reasonably well, and although you’ll still encounter a few potholes and rutted sections, you don’t need a 4WD vehicle unless the weather has been absolutely terrible recently.
It’s quite narrow in parts, and not really suitable for campervans if you’re coming from the west, although that doesn’t seem to stop people from doing so.
Whatever you’re driving, take it slow and allow plenty of extra time. That’s especially true if you’re driving at night (which I wouldn’t recommend if you can avoid it): there was no shortage of dead possums and other wildlife on the side of the road.
If you don’t have your own transport or would prefer not to drive on the gravel, you’re unfortunately out of luck. You used to be able to arrange a shuttle from Wairoa but that’s no longer an option, and there’s no public transport in the area.
Weather
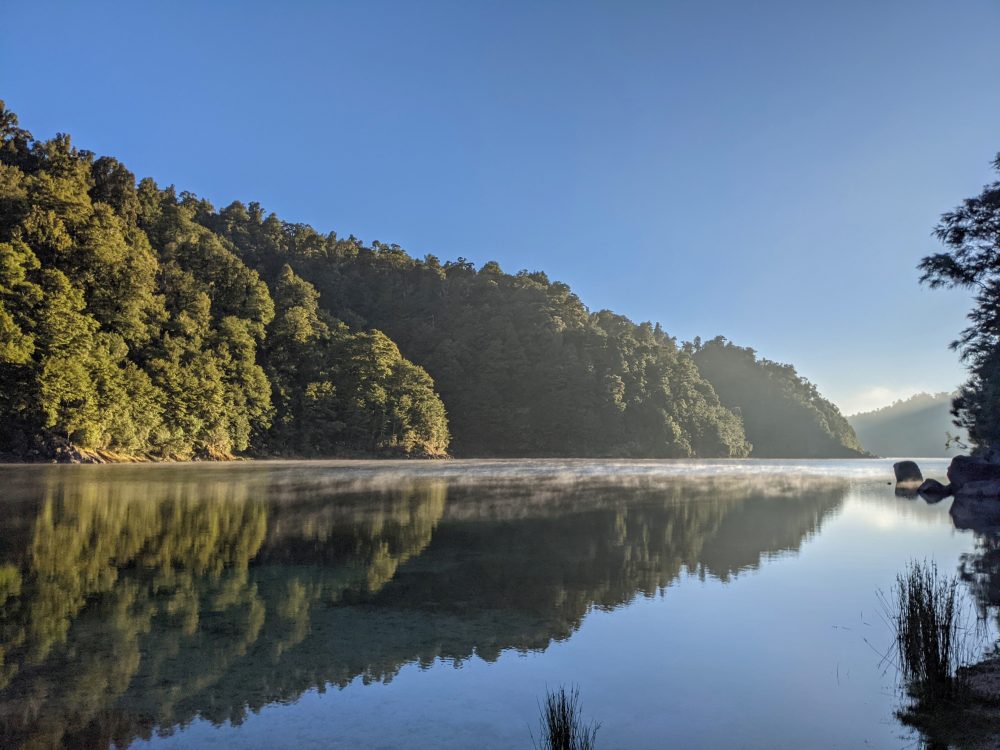
Waikaremoana roughly translates as “sea of rippling waters,” a reference to the consistent winds that disturb the surface of the lake. Strong winds aren’t uncommon, and even in summer they can bring plenty of rain with them, sometimes quite suddenly.
Equally, you may get bright sunshine, light breezes, and warm temperatures for your entire walk. We were very lucky, and other than light rain rolling in after we’d reached the hut at Panekire and a fog that soon burned off the following morning, we had spectacular weather the whole time.
As is the case with pretty much any multi-day walk in New Zealand, pack sunscreen, warm clothes, wet weather gear, and plenty of insect repellant, and you’ll be set for whatever shows up!
Accommodation
Given how long the drive is to either end of the track, there’s a reasonable chance you’ll want to spend a night nearby at the start, finish, or both. Options are pretty limited, but we stayed at the Lake Waikaremoana Holiday Park, which is on the shores of the lake in Te Karetu alongside the visitor centre.
A simple private cabin with a sink, fridge, bunk beds, and shared bathroom costs NZ$71, and we found ours more than adequate for a night or two. Fancier chalet-style rooms, powered and unpowered sites, family rooms, bunkhouses, and dorm-style accommodation are all also available.
There’s a large shared kitchen with plenty of space to cook up whatever you like, and you can rent pots, pans, plates, etc for a small fee if you don’t have them yourself. The onsite shop has basic supplies, but it’s worth bringing food with you if you can.
Accommodation on the track itself comes in two basic types: huts and campsites. There are five of each, but they aren’t always right beside each other, and there’s no campsite at the top of Panekire, so you’ll need to either stay in the hut that night or walk up, over, and down in a day.
Although this track is less popular than many other Great Walks, you’ll still need to book hut beds well in advance. Camping spots typically have greater availability, but you still need to have a booking for each night you plan to spend on the track before setting out. If you’re staying somewhere manned by a hut/campsite warden, expect to be asked for your name or confirmation number.
At time of writing, a hut bed costs NZ$35 and a camping spot NZ$19, making this one of the cheapest options as far as Great Walks go. You’ll pay the same amount per night for a hut regardless of which ones you stay in, but there are some pretty big differences between them.
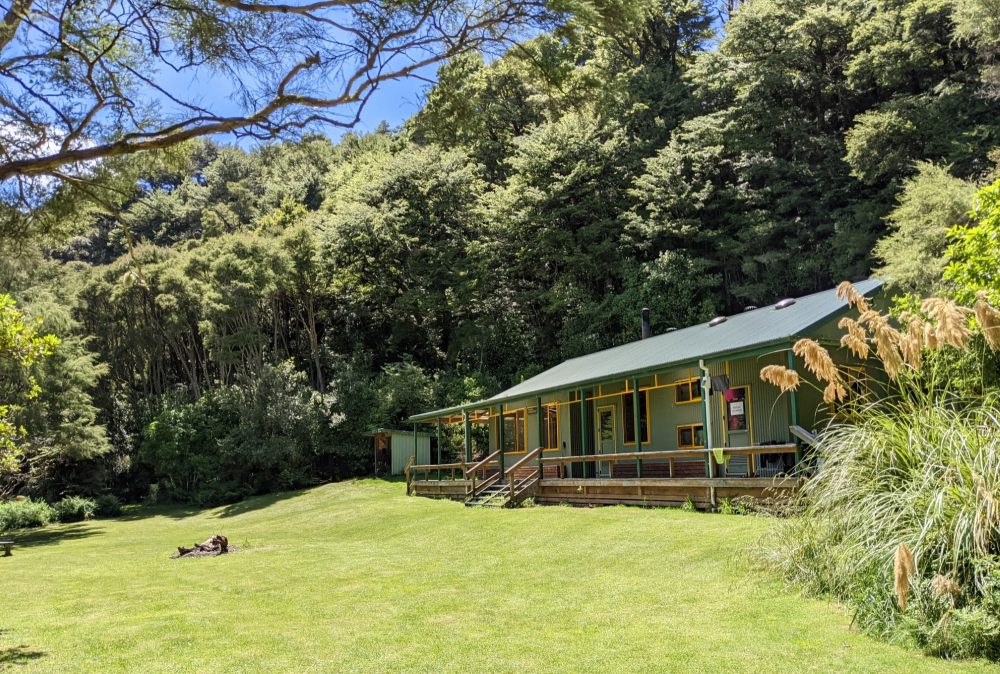
Waiopaoa and especially Waiharuru felt almost brand new, with large cooking/common areas, plenty of space in the bunkrooms, efficient fires for heating, and non-awful pit toilets.
Set on large grassy areas on or near the lakeshore, they’re definitely the best places to stay on the track. We spent a night in the former but not the latter: if your timings allow, it’s worth trying to stay in both.
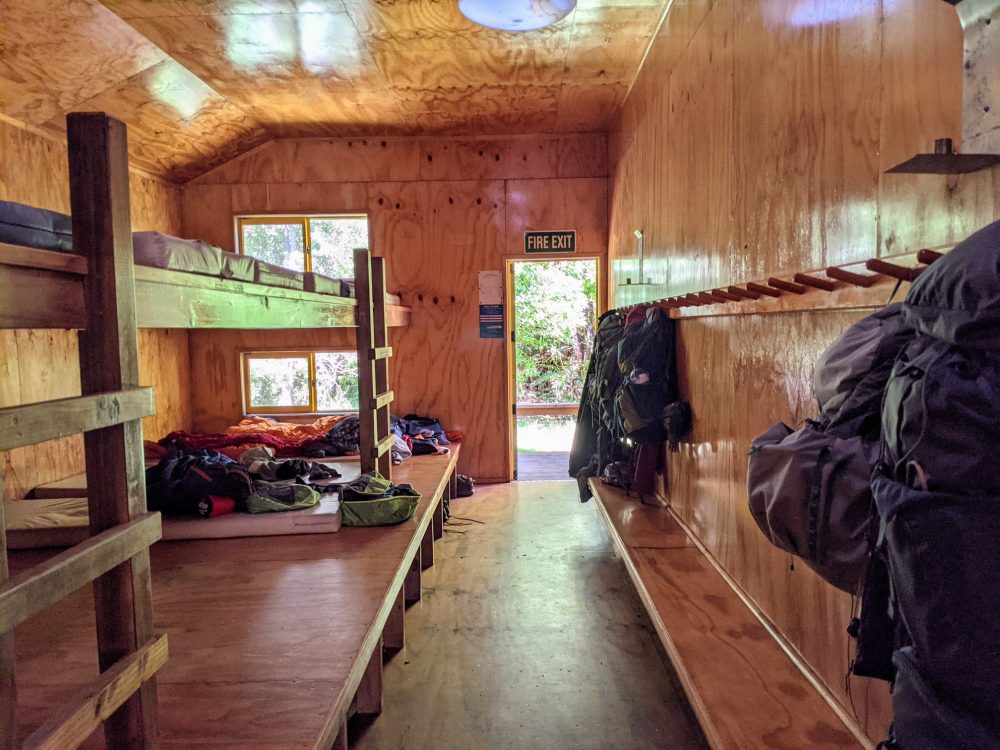
Panekire Hut was older and more run-down by comparison, with three rows of bunks in the cramped bunkrooms and a fire that wasn’t working particularly well on the wet night we were there. The toilet was best described as a place you wouldn’t choose to linger.
Marauiti is a smaller hut with fewer beds, and while it was again comparatively older and somewhat cramped, it was perfectly fine for a night. The lakeside location is beautiful, but as usual in New Zealand, that comes with a decent helping of sandflies, and there seemed to be a lot of blowflies around at the time we were there as well.
Mice can apparently also be an issue in this hut, although we didn’t see or hear any ourselves. It’s advisable to keep your backpack closed and hung up on a peg rather than leave it on the floor or benches overnight.
Whanganui Hut isn’t a popular option, since it’s right beside the water taxi pickup/drop-off point that marks the start or end of the track for most people. It’s a small, basic hut that’d be fine for a night if bad weather stopped the water taxi from running, but there’s no particular reason to stay there otherwise.
At a minimum, all of the huts have bunk beds, running water, a fire for heating, a pit toilet, and a kitchen/common area for preparing and eating food and relaxing after your walk. There’s no electricity, though, so bring your own lighting (torch, not candles!) if you plan to be doing anything after the sun sets.
Bear in mind that unlike some Great Walk huts, gas cookers aren’t supplied and there are no pots, pans, cups, or utensils either. You’ll need to bring it all in yourself. Detergent and scourers for washing up were provided in all of the huts, but I’d suggest having your own as well, just in case they aren’t there on the day you need them.
The campsites are relatively simple affairs, but you get running water, a sink, a toilet, and the ability to stay far enough away from other people that their snoring is less likely to keep you awake. There’s usually also a shelter to keep the sun and rain off your head when you’re not in your tent.
Food and Drink
As is the case with most other Great Walks, food is entirely your responsibility. The holiday park has basic supplies if you’re in need of something at the last minute, but once you’re on the track, whatever you’ve carried in is what you’ll be eating.
For ease of cooking, clean-up, and waste reduction (since you need to take out everything you take in, including food scraps and garbage), we took freeze-dried meals for each dinner plus a spare in case we got hungry or had to spend an extra night on the track due to bad weather.
We mixed and matched between different brands that we’d bought from outdoor stores and supermarkets, and while some were tastier than others, none stood out as being particularly bad or amazing.
For breakfast, I typically had a couple of protein bars (One Square Meal is a good brand), coffee, and perhaps a few squares of chocolate. Lunch was crackers, salami, and hard cheese, and again, usually a bit of chocolate to finish things off.
Speaking of coffee, I tried something new on this walk after a recommendation from a friend. Sick of drinking flavoured dirt (aka instant coffee) on multi-day hikes, I’d wandered into an outdoor store and invested in a Minipresso instead.
There are a few different models, but they all work in a similar way: add hot water and coffee in some form, pump the hand pump, create espresso, drink.
I went for the Minipresso NS version, which uses Nespresso-compatible coffee pods rather than ground coffee. That was purely for the lack of mess: it’s much easier to pack a few coffee pods in and out than deal with a container of coffee and disposing of the grounds after each use.
It’s a bit of extra size and weight, but man, starting and finishing walking each day with a decent coffee was life-changing on a hike like this. It was an extravagance, but a totally worthwhile one for me.
All of the huts and campsites have running water, and as usual, notices abound telling you to boil it for your own safety if you plan to drink it. That’s usually, but not always, a butt-covering exercise by DOC: if you get sick from drinking the water, you can’t say you weren’t warned.
I typically just ask the wardens if they drink the water themselves, and if it’s good enough for them, it’s good enough for me.
I didn’t have to refill my water bladder on the first night at Panakire Hut, but did so at Waiopaoa and the tap beside the private hut on the track the next day, and that was it. I boiled water for dinners and coffee each day anyway, so also just drank whatever was left after it had cooled down.
Your stomach is not my stomach, of course: make your own determination and boil or treat the water if it makes you more comfortable.
Gear to Take for the Lake Waikaremoana Great Walk
The DOC site has a good general gear list for the walk (in the What to Take section) which covers off the basics. This isn’t an alpine hike, and you never get above 1200m, so you don’t need much in the way of specialised gear.
The usual advice about layered clothing, protection from rain, sun, and cold, and dealing with emergencies applies just as much here as on any other walk in New Zealand, however.
I took a lot of my usual hiking gear on this walk. For my top half, I had two quick-dry t-shirts, a merino long sleeve base layer, a light jumper, and a waterproof Goretex jacket. For my bottom half, I had some quick-dry underwear, a pair of shorts, a pair of hiking pants, and lightweight waterproof trousers that thankfully never had to come out of their bag.
My usual combination of thick merino hiking socks with a thin liner sock underneath worked well, and I had a couple of each. Knowing the amount of rain that New Zealand can get, I’d gone for the waterproof version of my usual Merrell Moab hiking shoes, and they were comfortable and kept the water and mud out just fine.
Obviously that only works so long as the water/mud level doesn’t get higher than the top of the shoe, so you may want the boot version if you’re likely to get bad weather.
Other smaller bits and pieces included a cap, sunglasses, toilet paper, and a portable battery for charging my phone. I had a small first aid kit with bandaids, anti-histamines, etc, along with the usual toiletries like toothpaste and deodorant.
I packed a Kindle for reading in the hut or on the beach at the end of the day, and also took a small quick-dry towel: there’s nowhere to shower on the trail, but plenty of opportunity to swim in the lake instead.
I also took a hiking pole, and as usual these days, was glad that I did. My knees don’t love long downhills anymore, and the pole was also useful during the climb on day one and for stability in the few muddy sections on the final day.
Since we’d chosen to have freeze-dried meals each night and none of the other food needed to be heated up, it meant less cooking gear to carry with us. As a result I only took a small gas cooker and canister, a couple of plates and cutlery, a mug for coffee, and a camp kettle to boil water in.
The kettle turned out to be a piece of junk, with the spout partially melting on day one, but it still lasted for this and a couple of other multi-day hikes before I threw it out.
In terms of a backpack, I used an Osprey Atmos 65 AG hiking pack that I bought from Amazon while in the UK, but is also available in New Zealand from outdoor stores like Torpedo 7 and Bivouac Outdoors. This was the first time I’d used it on a multiday hike, and honestly, I couldn’t have been happier with it.
The “anti-gravity” (AG) harness really lived up to its name, and even at the start, with a few days worth of food and a couple of litres of water inside, it felt significantly lighter on my back than when lifting it out of the car. The 65 litre capacity was more than enough for all my gear and supplies, and it was easy to adjust the fit to stay comfortable even after several hours of walking.
I subsequently used the same pack on the Kepler Track (4 days), Rakiura Track (3 days), and Milford Track (4 days) with equal success. It’s now my go-to pack for multiday hikes of up to around five days in length, including those where I’m sleeping in a tent.
Get regular travel, hiking, and tech updates from me
News, reviews, guides, and more, from here and around the web
Lake Waikaremoana Great Walk: Day by Day
Below is a day by day description of the experience Lauren and I had on the Lake Waikaremoana Great Walk, hiking in December. We had generally excellent weather, no injuries or other problems to speak of, and a delightful time all round. Hopefully you’ll get to have the same!
The times I’ve listed below were how long it took us to walk each section. These were at the low end of the range given in the DOC brochure, for two reasonably fit people in near-perfect weather –it would definitely have taken longer if we’d had a decent amount of rain, especially on the downhill sections.
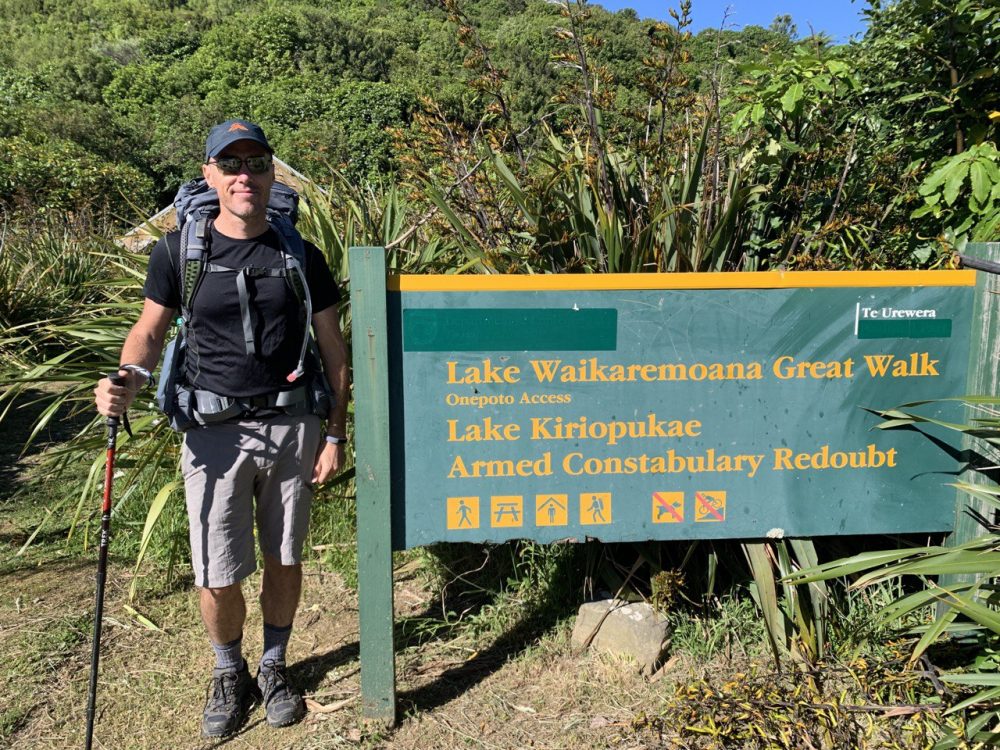
Day 1: Onepoto to Panekire Hut (9km, 4 hours)
After a surprisingly good night’s sleep at the holiday park, we enjoyed the luxury of our last cooked breakfast for a few days and headed for the start of the track at Onepoto, 15km back down the road we’d come in on the day before.
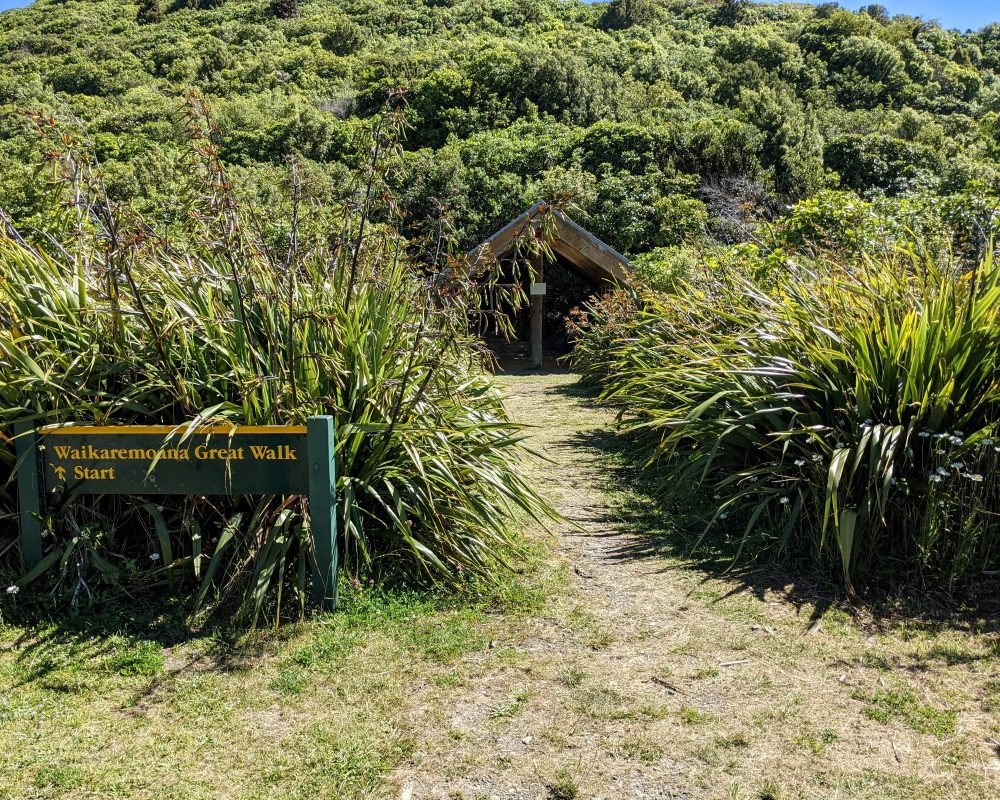
Arriving around 9 a.m., the carpark was busy but not full, with a few other vehicles disgorging hikers as we pulled in. Grabbing our poles and packs, we paused for a quick photo at the official start/end point, hitched our bags on our backs, and started walking. The first two minutes were somewhat flat. The rest would not be.
Knowing that almost the entire section was going to be uphill, but that we had all day to do it, we opted for a slow and steady approach. The track was pretty well maintained, mostly quite wide, and with little to no mud.
Although there was no shortage of tree roots in some sections, they didn’t pose much of a problem, and tended to create handy natural steps rather than trip me up every few feet like they usually do.
The advantage of taking things slowly is that we didn’t need to stop for breaks, and ended up making surprisingly good progress despite our quiet panting. We’d only been able to catch glimpses of the lake for the first 90 minutes or so as we climbed, the thick forest obscuring most of the views, but that was all about to change.
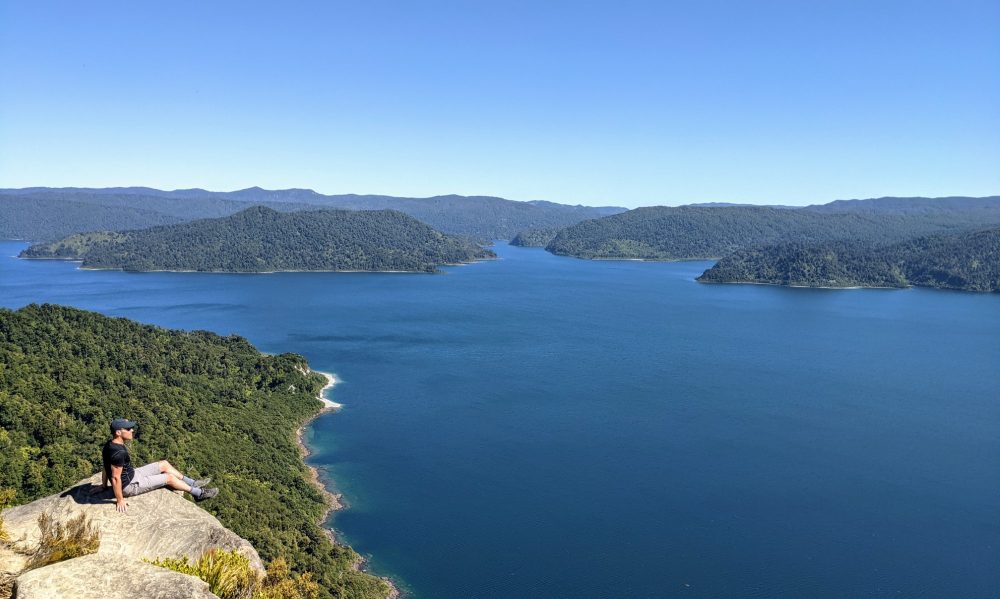
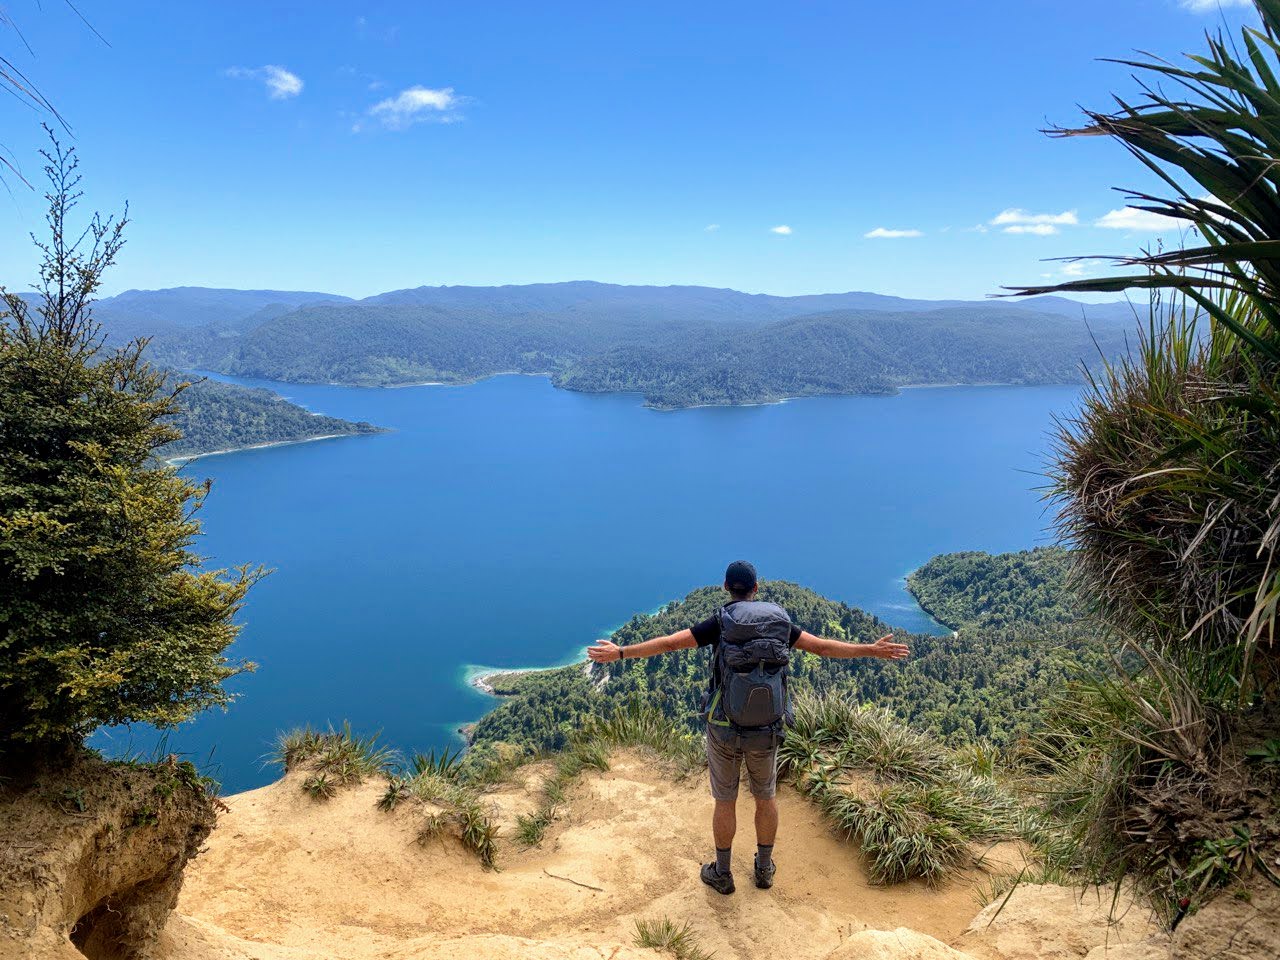
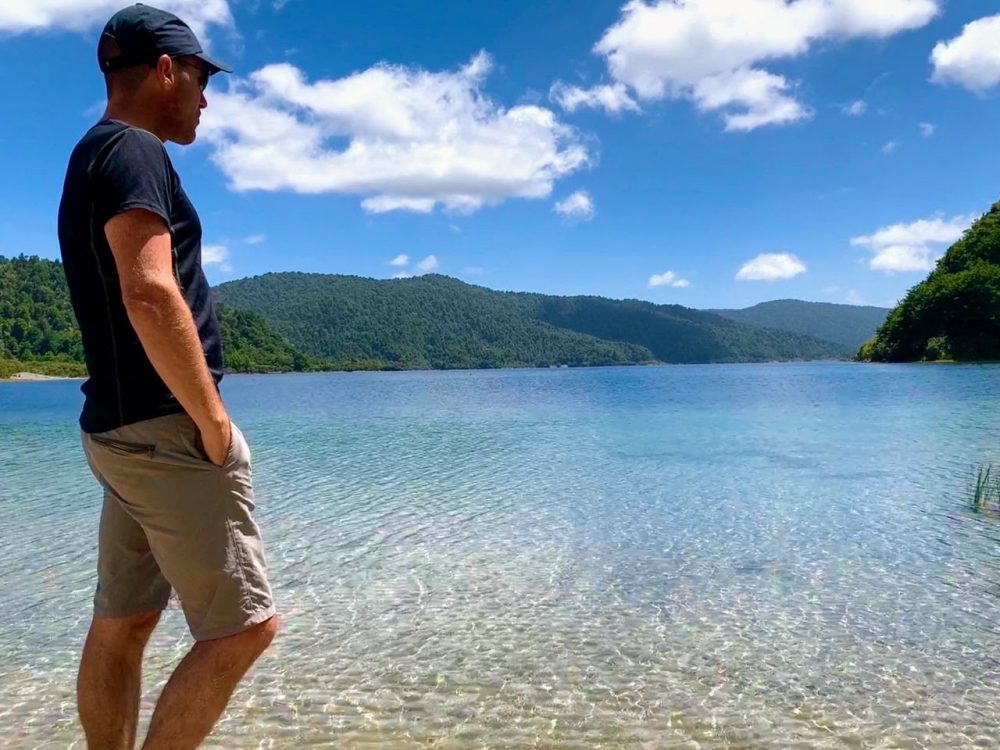
Spotting a gap between the trees, we walked through it and emerged into something of a wonderland. If you’ve ever seen a photo from this walk in the past, chances are it was taken from the rock ledge that I’m sitting on in the above shot.
On such a perfect blue-sky day, it was hard to think of anywhere else in the world that I’d rather have been, and after taking the obligatory nine million photos, it took us a long time to get moving again.
Still, with changeable weather in the forecast and a few hundred metres still left to climb, move again we had to do. Putting off a proper lunch until we got to the hut, we snacked as we came to the end of the short flat section and slowly made our way up the second part of the ascent.
A few more gaps in the treeline emerged alongside the trail as we walked, and we were rewarded with arguably even better views the higher we got.
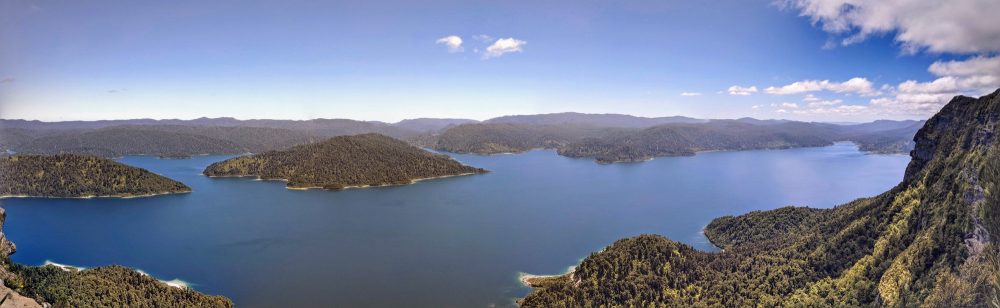
Finally emerging onto the Panekire ridgeline a little under three hours after we’d started, the final hour of walking was much flatter, and our pace noticeably increased. It wasn’t dead flat — there were definitely still a few ups and downs — but compared to what we’d just walked, it felt like a bowling alley.
We arrived at Panekire hut just after 1 p.m., with around a dozen other people milling around as we walked in. Some were just taking a lunch break before walking on, while others were clearly there for the night.
The latter group included a family who had dragged mattresses out onto the grass, the teenagers among them apparently intending to sleep in the woodshed to avoid listening to snorers. Given the forecast, I was prepared to take a nasal symphony over a cold, wet night in an open-sided woodshed with the silverfish and wetas, but each to their own.
After a late lunch and a coffee, the fog started to roll in right on cue. Before long the temperature dropped, we’d lost sight of the lake, and a few of us quickly scavenged enough fallen branches to provide wood for the night before the rain showed up.
The location of Panekire hut means it’s only accessible via a multi-hour hike or helicopter, and since the local helicopter pilot had been out of action for a while, the wardens hadn’t been able to refill the woodpile for a few weeks.
The hut itself was very much of the older style, a bit run down and quite cramped for the 36 inhabitants that night. Well, I say 36 — as it turned out, the woodshed family had skipped an earlier hut and shown up at Panekire a day early, which meant there was no space for the people who arrived late in the afternoon.
There’s a reason you need to book each night’s accommodation on the Great Walks and stick to it! Everyone squeezed up, though, and nobody had to sleep outside except the two (by now very cold) teenagers that had chosen to.
Making friends with a few fellow hikers, we sat down after dinner to be taught the intricacies of the Golf card game. It’s ideal for wet nights in hiking huts with strangers, taking about five minutes to learn and just enough skill to keep you from falling asleep, and we played it for hours by torchlight.
Let’s face it, with the rain pelting down outside, there weren’t a great number of other entertainment choices.
Day 2: Panekire Hut to Waiopaoa Hut (8km, 3 hours) plus Korokoro Falls return (9km, 2½ hours)
After exactly as good a night’s sleep as you’d expect in an 18-person bunkroom, the following morning dawned foggy and cold. Thankfully the rain had disappeared, though, and we wouldn’t see any more for the rest of the walk.
We set out into the gloom around 8 a.m., and the frigid temperatures were all the incentive I needed to move as quickly as the slippery downhill trail allowed.
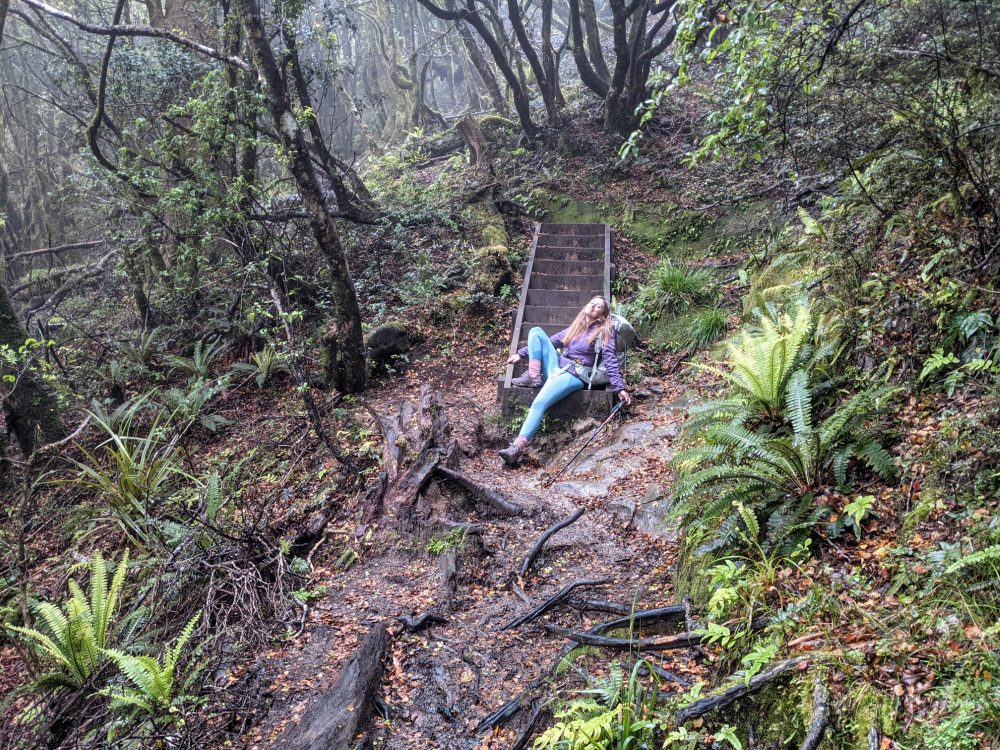
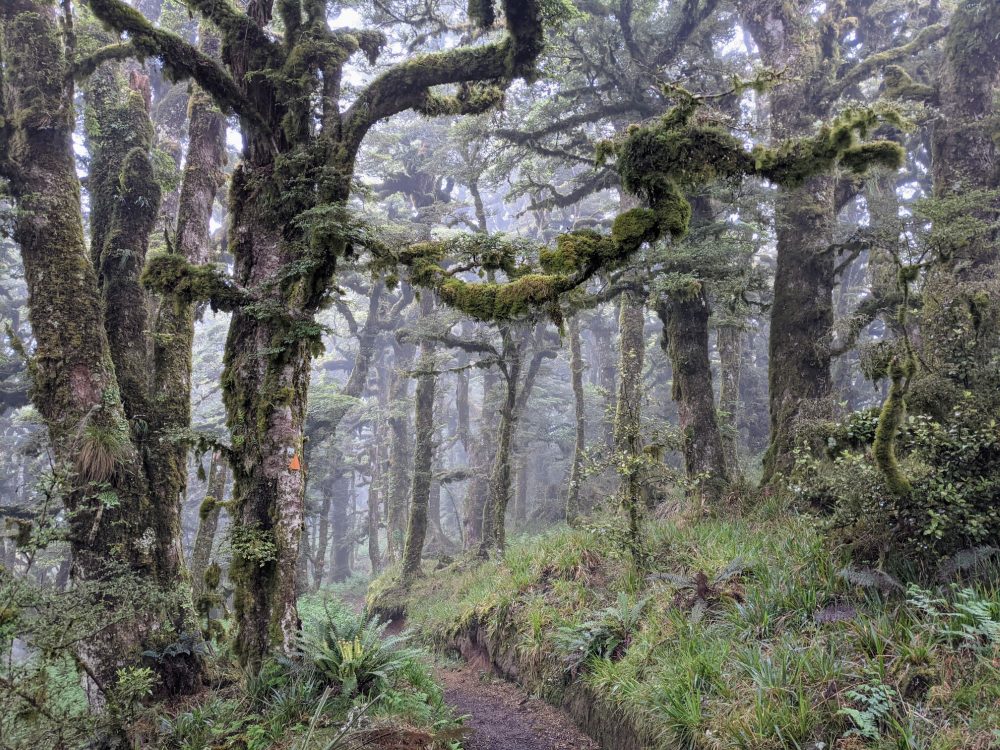
It took about an hour for things to warm up enough for my teeth to stop chattering, but at least the scenery was beautiful, in a frozen haunted forest kind of way. Mossy branches hung over the trail, water dripped from overhead, and tendrils of fog curled around the trees and ferns in every direction.
By the time we got back to lake level, though, the sun had broken through the fog and we were bathed in sunshine once again. The descent took around three hours, and other than the occasional sliding around on slippery rocks, it wasn’t particularly difficult.
Almost before we knew it, we’d arrived at Waiopaoa Hut, our home for the night and a noticeable upgrade on the cramped quarters of the night before. The large, modern hut was beside the lake, at the top of a large grassy lawn that sloped down to a gravel beach.
We were one of the first to arrive for the day, and stood around chatting with Bill, the hut warden, for a while before dumping our packs and going to hang out beside (and in) the lake for a bit.
With plenty of time to kill after lunch, we decided to visit Korokoro Halls that afternoon. Since the turnoff was around 45 minutes further down the track, doing it this way wasn’t particularly logical, since it meant at least an extra hour and a half to walk there and back versus just waiting until we passed by the next day.
On the flipside, though, it was easy walking since we didn’t have our packs on, and it saved an hour the following day on what would turn out to be a surprisingly tiring walk even without the side trip. On balance I think it was the right approach, but others may not agree!
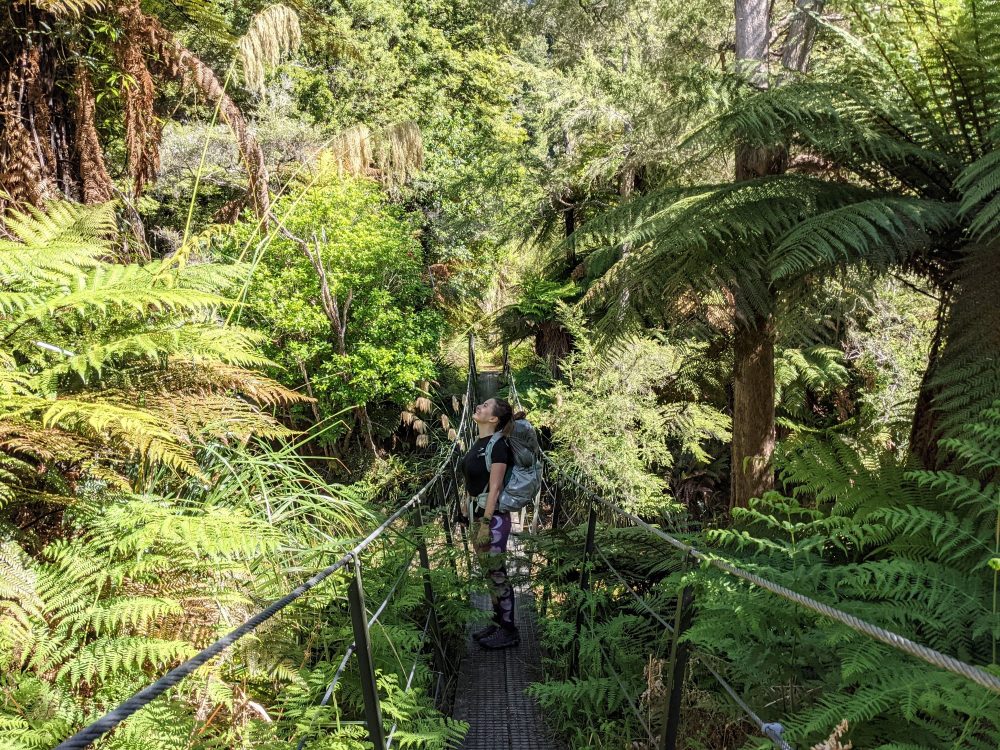
The walk to the turnoff was easy and uneventful, winding through lakeside wetlands and over a swingbridge or two before turning back into the forest. After around 50 minutes we arrived at a clearly marked junction and turned left. The side trail to the waterfall was in good repair, little different to the main track, and we didn’t see a single other person on it.
From the junction it’s around a half-hour walk to the waterfall, an easy stroll right up until the end. That’s where we had the unexpected pleasure of a rock-hopping river crossing, something we hadn’t seen mentioned in the brochure or elsewhere.
The metal wire strung between the two banks meant the crossing wasn’t particularly difficult when we did it, although Lauren’s shorter legs did make some of the hops a little more challenging!
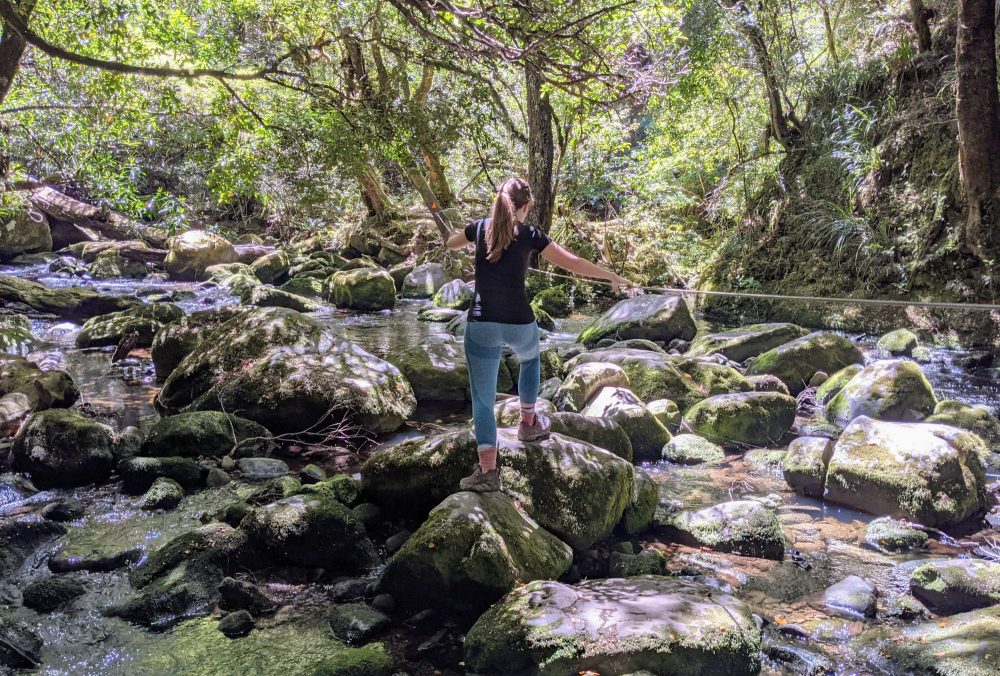
It’d be a much more interesting crossing if the river level was high, though, so bear that in mind if there’s been a lot of rain around in the days beforehand.
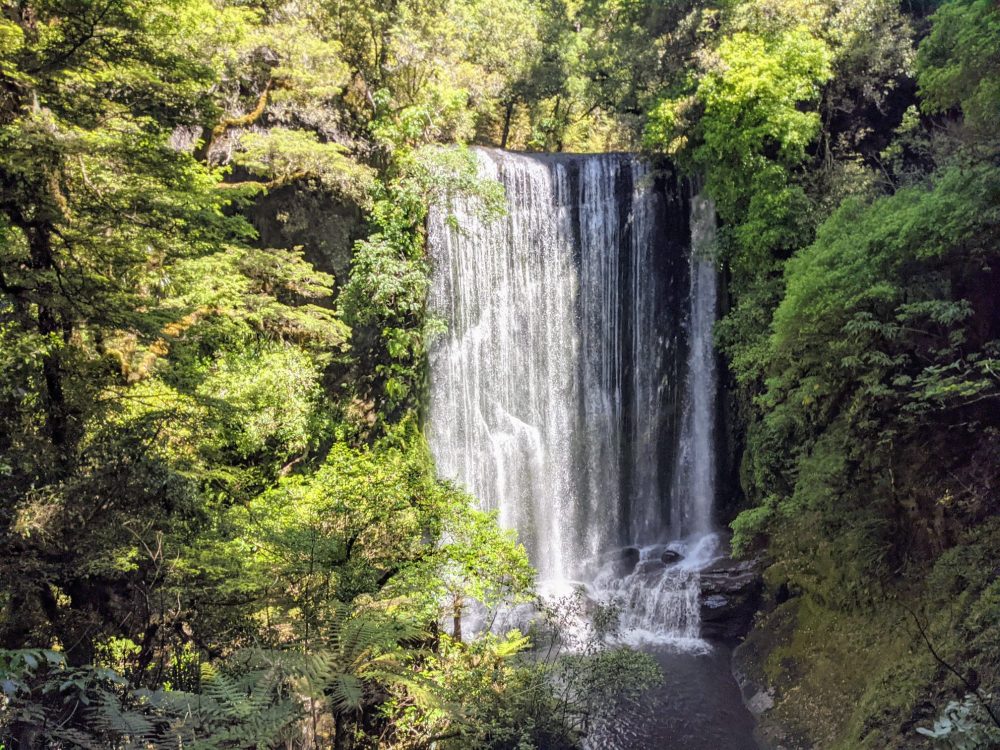
That obstacle successfully navigated, at least until the trip back, it was only another few minutes to the thundering waterfall. It was an impressive sight, honestly far more so than I’d expected, and we hung around snapping photos for as long as we could stand the swarms of sandflies. So, about five minutes, then.
You can clamber down to the pool at the bottom of the waterfall if you’re in need of a dip, but the idea of exposing any more skin to biting insects wasn’t all that appealing.
After returning to the hut, the highlight of the evening was warden Bill’s welcome (pōwhiri) to the hut, and explanation of Tūhoe history and relationship to the land we stood on.
There are longer-term plans to firmly incorporate Maori traditions, culture, and architecture into this Great Walk experience, and if they come to fruition, it’ll make the Lake Waikaremoana walk dramatically different from any of the other major hiking trails in New Zealand. I hope it happens.
Day 3: Waiopaoa Hut to Marauiti Hut (12km, 4½ hours)
After a better night’s sleep, two protein bars, and a coffee, I was ready to face anything the following morning. Just as well really, as this third day ended up being noticeably harder than expected.
We’d anticipated a pretty easy day, but the combination of the previous two days catching up with us and the elevation chart being more than a little deceptive meant we were both pretty tired by the time we got to the end.
All of that lay ahead of us, however, as we set out under bright sunshine on the same trail we’d walked the previous afternoon. Several backpacks waiting for their owners at the turnoff to Korokoro Falls made us appreciate the solitude of the day before, and we carried on with a spring in our step, glad we didn’t need to make the detour this morning.
The trail ambled along beside the lake, climbing up and down small ridges as we walked from bay to bay. The climbs and descents weren’t long or difficult (I doubt the elevation change was ever more than 50m) but there were a lot of them and they added up, especially since pretty much none were shown on the map.
The DOC brochure calls this part of the track “undulating.” By the end of the second or third hour, we had several other names for it.
Despite the aching legs, though, this was as beautiful a section of trail as any other. Burbling streams ran alongside tall rimu trees climbing skyward, the wooded sections broken up by small beaches and views out across the western arm of the lake.
After around three hours or so of walking, a private hunter’s hut provided the perfect spot for lunch. You can’t access the hut itself, but there’s a table outside and a tap that’s fed from a mountain stream that’s safe to drink from. Can’t ask for more than that!
A little over 4½ hours after we’d started, we spied Marauiti Hut across a grassy meadow. A few metres from the lake, this small, older hut only had a couple of other people around when we arrived, but it was full by mid-afternoon.
It was fine for a night but not a patch on Waiopaoa, or (as it turned out) Waiharuru that we passed a couple of hours further down the trail the following morning.
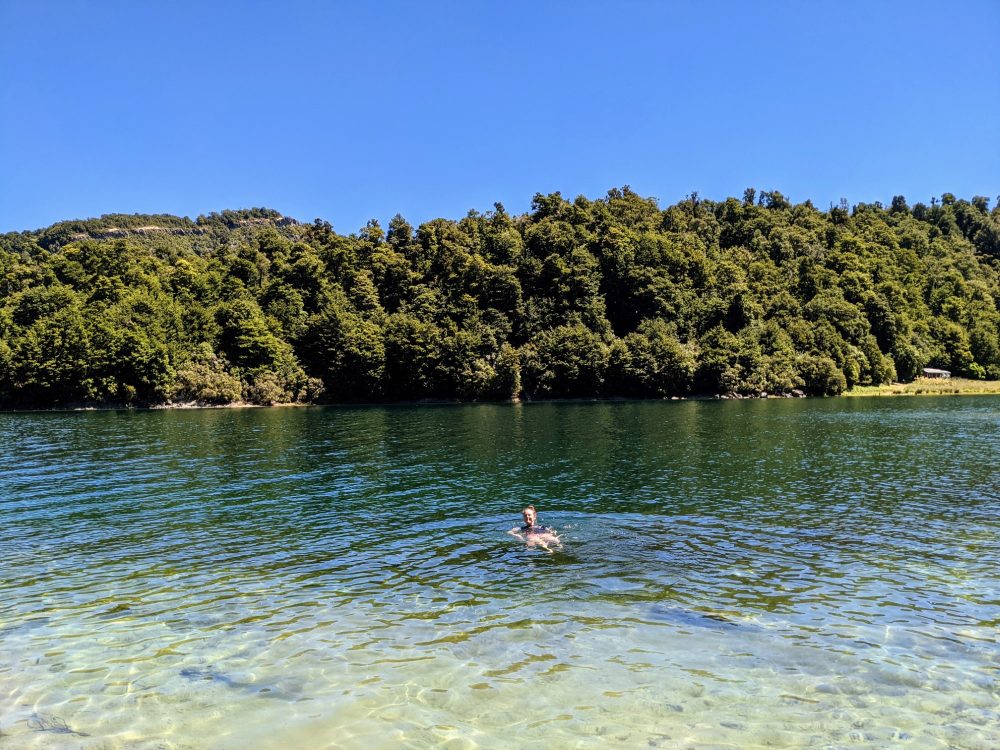
Still, you can’t argue with the lakeside location, even if it attracted the blowflies during the day and sandflies at night. We paddled in the shallows close to the hut for a while, before taking a tip from one of the other hikers and wandering 15 minutes around the bay to the opposite beach.
Clambering down off the track to a small beach and with nobody else around, we split the rest of the afternoon between cooling off in the lake and warming up again alongside it.
Having the whole place to ourselves for hours, in such a spectacular environment, was easily one of my favourite moments of the entire walk. And no, not only because it didn’t require any actual walking.
Dinner was the usual mix of chocolate, nuts, and a freeze-dried attempt at Thai green curry and rice. With the only entertainment option being a bizarre monologue from a Covid denier who was unfortunately also staying in the hut that night, I went to bed early to read my book instead.
It got dark just after 9 p.m., and I was asleep 10 minutes later. Ahh, the joy of days of long walks and no lights in the huts!
Day 4: Marauiti Hut to Whanganui Hut (12km, 4¼ hours)
With our water taxi booked for 2:30 p.m. and maybe five hours of walking ahead, we’d planned to leave around 8 a.m. Instead, that early night coupled with the sun streaming in the windows from 6 a.m. saw us standing around looking at each other outside the hut an hour early, admiring the last of the fog drifting across the still water in front of us.
“Shall we just go?” Lauren asked. “Can’t see a reason not to” I replied, and with that we were off.
The ever-(un)reliable chart in the brochure showed more elevation change on this final day than what we’d had the day before. It took about the same length of time, but for me at least, felt like easier walking overall.
A word of warning with that, though: despite there being no rain for three days by this point, the latter parts of the track had a few decent muddy sections. It wasn’t a big deal, only ankle-deep, but I suspect it’d be a different story after a downpour or two.

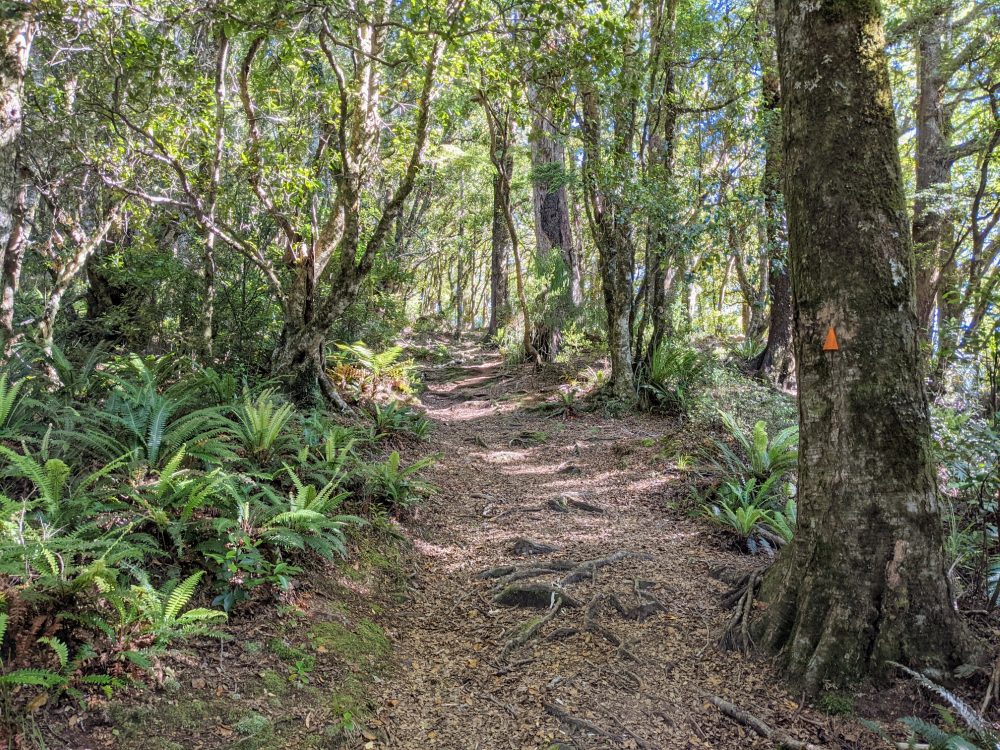
A downpour was the last thing on our mind, though, as we wandered along the soft, leafy trail. With light packs, blazing sunshine, and the birds doing their best to drown out our conversation, it was the kind of moment that felt like it belonged in a Tourism New Zealand marketing campaign. I was half-expecting to round a corner and find Crowded House crooning among the nikau groves.
We arrived at Waiharuru hut after a couple of hours, and immediately saw why someone we’d met the day before had referred to it as the Hilton. A huge kitchen area! Plenty of space! Separate bunk beds! Fancy.
I dragged my feet slowly past as I peered inside the buildings, waving to a couple that we’d met earlier in the hike and wondering why we hadn’t chosen to stay here the night before.
The spacing of the huts means it doesn’t make all that much sense to stay at Waiharuru if you’re walking the same direction we did, but if you’re going the other way? Walk in from Hopuruahine Landing after lunch, stroll for a couple of hours, and enjoy the lakeside luxury.
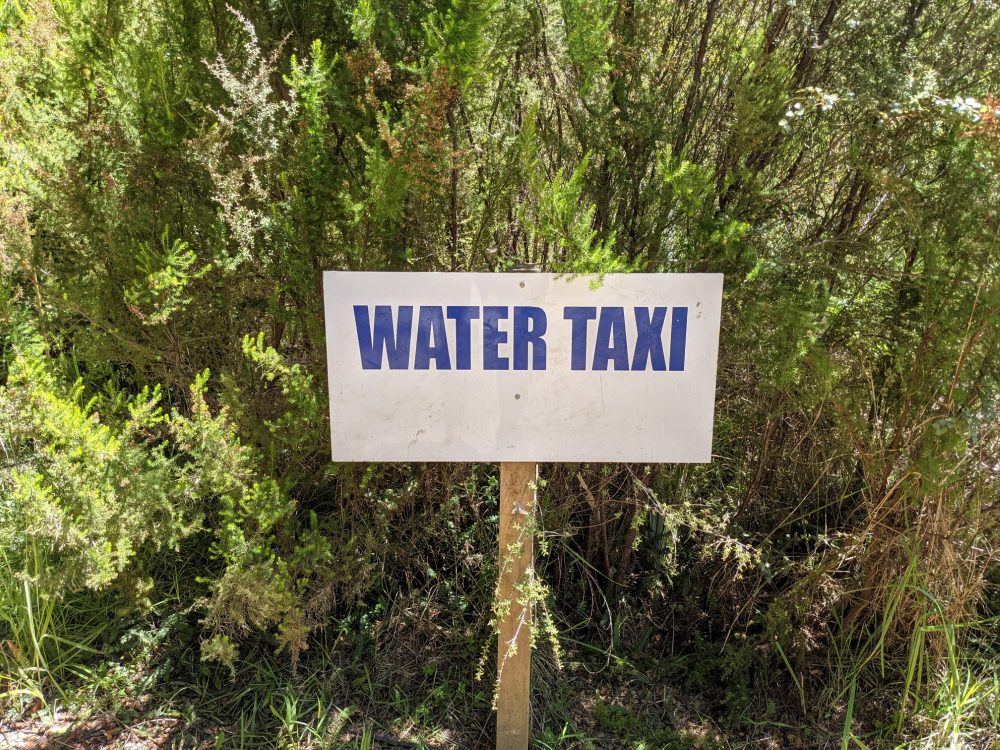
Despite the final climb up and over the ridge at Tapuaenu Bay and those muddy sections I mentioned earlier, we set a cracking pace. Barely four hours after we’d set out, we stumbled upon a track junction with the magic words “Water Taxi” printed on a large sign.
That was handy, since I hadn’t been exactly sure where the pickup point was: it’s moved around a bit in recent years due to changing lake levels.
As it turned out, it was barely five minutes south of the small, basic 18-bed hut at Whanganui. It’s not somewhere that you’d typically choose to linger, but with 2½ hours until the taxi was due to arrive, linger we did.
Numbers slowly grew as time went by, until it was clear that multiple trips were going to be in store. A couple who hadn’t booked the transfer in advance decided to walk to the end of the trail and try to hitch back to the start instead: we saw them again nearly four hours later at the holiday park as they were getting their final lift to Onepoto.
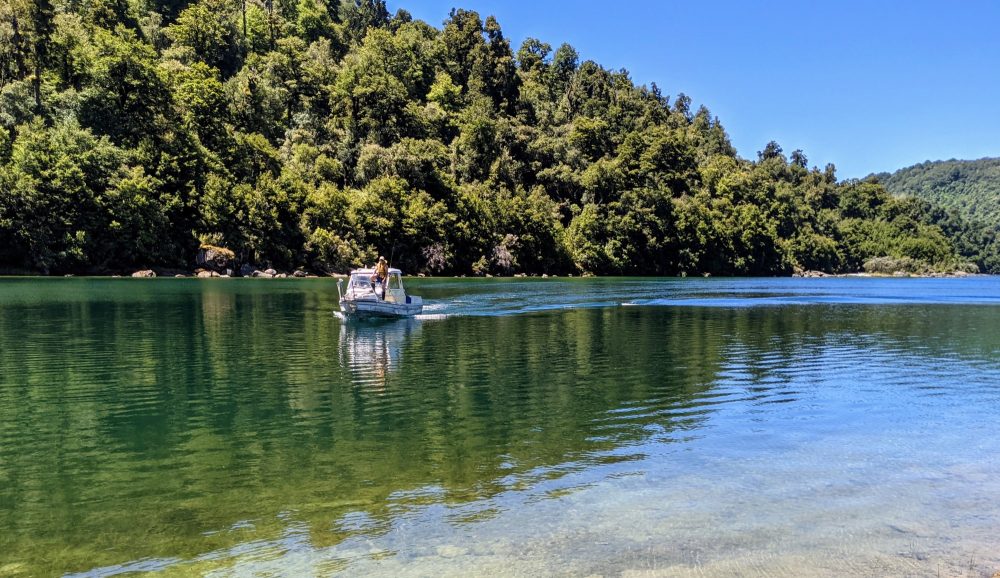
Nobody quite knew how large the water taxi was, but the answer was clear as it slowly pulled up onto the beach at 2:30pm: not very. We weren’t part of the first group to get their names called out, but on such a glorious day, it didn’t feel like much of a hardship to have to take a dip in the lake and snooze on the beach for an hour before the boat returned.
By 3:30pm we were zipping across the water, the trip back to Onepoto taking barely half an hour. It was a nice way to finish the hike, with glorious views across all the ground we’d covered over the previous four days.
Before we knew it we were clambering out of the boat, wandering up the road to our car, and heading back to the holiday park to collect our other bags and buy the two coldest drinks in the fridge.
All that lay ahead now was the better part of two hours of gravel road, another hour on the highway to Taupo, a very hot shower, and the largest pub meal I could find. One more of New Zealand’s Great Walks done and dusted!


This was such a great article to read. Booking the trip right now. Loved the “undulating” humour spread throughout and cannot wait to do this walk. When did you walk it by the way? Thanks for taking the time to write this 🙂
Thanks Natalie! We walked it in December 2020 – I mentioned it briefly in the post, but it’s easy to miss! 🙂
Just spent some wonderful minutes to read your post and to get inspired. I’ll be on the walk in February ’23 and hope I’ll have the same stunning views you had. Thanks a lot for your great article!
Just one question: Is it possible to rent cooking gear for the walk at the holiday park? You mentioned that there is some gear to rent but it’s not clear whether it’s only for the holiday park or for the walk as well.
Not that I’m aware, no — pretty sure the cooking gear is only for use in the holiday park. It wasn’t really hiking-friendly equipment anyway, mostly large saucepans and frypans, so it’d be pretty heavy to carry with you.
You don’t need a lot of kit though — I only took the bare minimum (little gas cooker, lightweight kettle, mug, and a plate) and just used the dehydrated meal packs you can get from any of the outdoor stores. You just open the pack, pour hot water into it, and leave it for a few minutes, so there’s no need for pots and pans. Surprisingly tasty, especially after a long day of hiking! 🙂
I found this very helpful! Thank you so much. Just a further question, did you leave your car at Onepoto? Is it safe to do so?
We did, and it was for us. I obviously can’t give any guarantees, but there were a lot of other people doing the same thing at the time.
Thank you very much for this!
Extremely useful info about the track!!!!!!
Thank you for such an informative post. We go prepared
Ciao Dave, any showers in the huts? also can you confirm that will be no cooking facilities in any of the huts? Thanks
Hi Daniela,
Nope, no showers in the huts, but some of them are right beside the lake so you can take a dip there if you’d like to. There were no cooking facilities in the huts that I stayed at, and I don’t think the others had them either.