The Naturehike Cloud Up 3 Is So Much Better Than It Should Be
Articles on this site contain affiliate links, meaning I may be compensated if you buy a product or service after clicking them. The full privacy & disclosure policy is here.At the start of this year, I finally got around to buying a lightweight tent for Lauren and I to go camping with, something I’d been looking at doing for far too long.
I already had a three-person Coleman tent, but it’s about 20 years old and too heavy to use for hike-in campsites. We wanted something that wouldn’t break our backs, but also wouldn’t break our bank accounts: at that point, we really didn’t know how much we’d end up using it.
I procrastinated researched for ages, and was already leaning towards the Naturehike Cloud Up 3 when a well-timed sale pushed me towards the checkout screen. I went for the 20D nylon version (more on why below) in forest green, which seemed like the most subtle of the available colours.
As I write this I’ve used this tent for a total of 23 nights, both with Lauren and solo, in two different countries. Here’s how it’s gone.
Specifications
|
Capacity: |
2 people comfortably, 3 uncomfortably |
|
Weight: |
2.4kg (5.3 pounds) |
|
External dimensions (inc. vestibule): |
290 x 180 x 110cm (114 x 71 x 43 inches) |
|
Dimensions when packed: |
51 x 18 x 18cm (20.1 x 7.1 x 7.1 inches) |
|
Materials: |
20D nylon |
|
Entrances: |
One, front |
|
Footprint/groundsheet: |
Included |
|
Ventilation: |
One vent at each end |
|
Pegs: |
13 aluminium ground nails |
|
Type: |
Free-standing |
|
Seasons: |
3 |
Features and Design
Let’s get the most obvious thing out the way first: this isn’t really a three-person tent. Yes, sure, if one of the people is a small child or you’re sharing with two other small, slim tentmates, you might get away with it, but otherwise you’re not going to be getting much sleep with three people in there.
For two people, though, the size is ideal. I’m 175cm (5’9″) and Lauren is 157cm (5’2″), and even with our sleeping mats, sleeping bags, extra clothes, and whatever else we want in the tent with us at night, we have plenty of space to spread out.
We’ve also slept with both of our backpacks inside the tent rather than in the vestibule: it worked fine because we could stack them at Lauren’s feet, but it would have been more of a squeeze if she was much taller.
While the tent is marketed as being “ultralight”, at 2.4kg (5.3 pounds) it’s still too heavy for true ultralight hikers for whom every gram counts. Fortunately, while I care a lot about the weight of what I carry, I care equally about how much it costs: this is about as light as you’ll get without spending (a lot) more money.

There’s a single front entrance: ideally I’d prefer one on each side so either of us can get in and out without climbing over the other. It’s functional and I guess slightly helps with weight, but it isn’t my favourite way of doing it.
The inner layer of the tent is a mix of 20D nylon for the floor and up the sides, and bug-proof mesh for the top, front, and back. It’s a bathtub-style floor that extends a few inches up the side, helping keep water out.
You need that bathtub floor since the fly doesn’t extend all the way to the ground, so water could otherwise come in underneath. That hasn’t happened to me, even in strong winds and rain, so the design works, it just lets more cold air in and warm air out if you’re camping in cooler climates.
The fly is also made from 20D nylon, at least on this model. There’s also a 210T polyester version that’s slightly cheaper, but it’s heavier and the waterproofing and durability aren’t quite as good. For the minimal price difference, the nylon felt like a better choice.
Unlike some of its more-expensive competitors, the Cloud Up 3 comes with a footprint to protect the floor of the tent from sharp stones, thorns, and whatever else you didn’t happen to notice when choosing where to pitch.
It’s a valuable addition, since while I wouldn’t say the floor feels fragile, it’s pretty lightweight: over time it wouldn’t take much to end up with a hole in it. The mat is fractionally larger than the floor of the tent, with tags at each end that have eyelets to put the base of the poles into.
I’ve used it every time I’ve pitched the tent, whether on hard ground or soft. The extra layer between me and the ground helps with moisture when the ground is wet, and adds a bit more insulation as well. Not much, but a little.
The asymmetrical design means that the ceiling is high enough to easily sit up inside the front half of the tent. That extra height does make the tent catch more wind, but that’s an unavoidable side effect: on balance, I preferred the extra space.

There’s a vent towards the top of each end: the flap closes with a Velco strip, or props open for better airflow. I generally leave both open to avoid condensation unless it’s absolutely pouring with rain.
The vestibule in front of the entrance isn’t particularly big, but there’s still enough space to store our shoes and a couple of mid-sized hiking packs without them getting soaked by rain or dew.
Inside, there are mesh pockets near the roof for storing things like phones, wallets, and keys somewhere safe off the floor, and a hook for hanging a small torch or lantern.
That’s pretty much it in terms of features: this is meant to be a lightweight tent, after all, so I don’t expect much in the way of extras.
Since the price was so reasonable, we ended up buying two of these tents: one to use in Australia, the other to use for the South West Coast Path in the UK. Despite both tents being listed as the upgraded model of the 20D nylon version, there was a minor difference between the two.

The plastic clips that connect the inner mesh to the poles on the version I bought in Australia have two hooks that twist into place, while the ones on the UK version were a more traditional push-down style. I preferred the twist type, but there was no difference in how well they worked.
Does that mean one of these tents wasn’t actually the “upgraded” version”? I don’t think so: as I understand it, the upgrade added a second vent, which both of them have. If the clips were the only difference, it wouldn’t be much of an upgrade!
The marketing material on the UK model does say it uses the twist-type clips, and if I’d had more than a day between receiving it and heading off to start the walk, we might have returned it. As it was, though, it didn’t matter in the slightest.
Pitching

I was impressed with how easy the Cloud Up 3 was to pitch, even by myself. The first test pitch in the backyard when it arrived took 15 minutes; after doing it a few times in the real world, I had it down to barely five minutes.
It’s a bit quicker if you’ve got someone helping you, especially when it’s windy: getting everything pegged down before it flies away in a stiff breeze is easier with two people!
The process is about as straightforward as I could ask for, and easier than many other tents I’ve used. Assuming you’re using the footprint (I always do), you start by laying it out and pegging down the tags on each corner.
From there, you unfold the pole sections and join them together. They’re all pre-connected to each other with internal elastic bands, which makes them faster to set up and (especially) pull down.
You’ll end up with two pieces at each end that form a Y shape, connected by a longer curved pole with a crossbeam that supports the roof. Each end of the poles goes into the eyelets on the footprint, with the larger Y section towards the entrance of the tent.
The inner mesh layer clips onto the downward-facing poles in several spots, and each end of the crossbeam then slots into a small flap of material. This was very tight the first few times I pitched the tent, but loosened up a bit after that, making it easier to slot into place.
The inner layer has the same eyelets as the footprint, so the base of the poles ends up going through both. These tags also have a clip on each end, which attaches to a buckle on the fly.

Assuming conditions are warm and dry enough, you don’t have to use the fly: the mesh keeps the bugs away, and if you don’t care too much about privacy, it may be all you need.
If you are using the fly, though, you simply lay it over top of the frame (making sure the door is facing the right way!), click the buckles into the clips on the inner layer, then peg it out and tighten everything up.
The pegs are about 10cm long and made from an aluminium alloy: that’s great for keeping the weight down, less great for not bending them on hard or stony ground. A few of mine are already looking worse for wear. On the upside, they all have little loops of string attached that makes them easier to pull out of the ground: a nice touch.
And that’s pretty much it. The tent comes with extra lengths of guy rope that connect to anchor points on each side of the fly, for more stability in strong winds. I can’t say I noticed a lot less flapping the couple of times I used them, but they did help a bit.
Real-World Experience

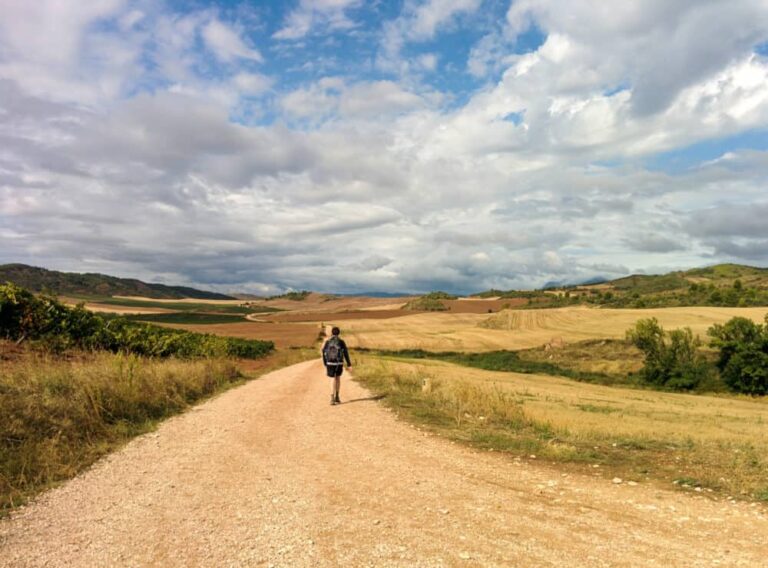
Over the last nine months, we’ve used this tent in two quite different ways. In Australia, we’d camp for a night or two at a time with it, sometimes at walk-in campsites, sometimes at sites you could drive to.
In the UK, we walked with it every day and used it almost every night for three weeks on the South West Coast Path, before Lauren picked up an injury that forced her to stop and I bought the one-person version of this tent to carry on with. There’ll be a review of that coming soon!
Most of the time we split up the tent when hiking with it: Lauren carries the poles, pegs, and footprint, I carry the inner and the fly inside the main stuff sack. It’s not an exact 50/50 weight split (the inner and fly are slightly heavier) but it’s pretty close.
We were camping in early autumn in Australia, with warm, sunny days, cool nights, and no rain. In the UK it was late summer, and a particularly good one at that: warm to hot days, relatively little rain, and mild nights. We did get plenty of wind at some points, though: all of this made for good conditions for testing!
Overall I was very happy with the performance of this tent, but in the interests of providing somewhat more useful comments than that, here are a few specific thoughts:
Rain and dew
When deciding to use this tent for several weeks in the UK, how well it would handle rain was my biggest concern. In the end we were quite lucky, with only a few wet nights to deal with, but a couple of times the rain was both heavy and long-lasting.
The waterproofing held up just fine, even when it rained on and off for most of the night: no rain ever came into the tent unless I’d forgotten to close the vents at the top. Even then, it was only a few drops at most.
As long as the fly was tightly staked out, light to moderate winds weren’t enough to push it onto the inner layer and transfer water through. In strong wind and rain, the fly would occasionally touch the inner mesh and create a damp spot, but nothing more.
In weather like that, or when the dew came in on colder nights, we just had to make sure our feet were a few inches from the back of the tent so our sleeping bags didn’t get wet from brushing the wall as we slept. That’s a common issue with many tents, though, not just this one.
Condensation

We had no issues whatsoever with condensation, even with two people in the tent on cooler nights, and I suspect having both vents open almost all the time is the main reason. That said, it never got below about 10oC, so I guess there’s still a chance in colder conditions.
Wind
Like any ultralight tent, strong winds are always a cause for concern. This is probably the one area where I feel like the Cloud Up 3 shows its budget nature.
The southwest coast of the UK is the windiest part of the country, and at times it made a point of proving that. One night in particular, when I was camping right on the coast and the wind was regularly gusting to 40mph, I was woken up by the rear poles of the tent bending over to such an extent that they’d hit my legs!
I’d pitched with the smaller end of the tent facing the wind: on other windy nights, facing the front of the tent into the wind helped reduce the amount of flex a little, but not a lot.
The poles never broke or permanently bent, but even so, I wasn’t very confident when using the tent in winds that strong again. Finding less-exposed pitches became a much bigger priority after that!
Temperature

The open design of the tent, where there’s a decent gap between the bottom of the fly and the ground, coupled with the dual vents made me suspect that staying cool wouldn’t be a big problem on all but the hottest nights.
That’s how it’s turned out: even on warm nights with minimal breeze, neither of us got uncomfortably hot in our sleeping bags/quilts.
Staying warm on colder nights was more of a concern, and the main reason (other than the flexing in strong winds) that this really isn’t a four-season tent. Spring through autumn you’ll likely be fine if you’ve got a good sleep system paired with extra clothes to put on if the temperature really drops, but this isn’t the warmest of tents.
Durability
Durability with lightweight tents can be a hard thing to assess, since they’ll often work perfectly until they fail. All I can really say is that so far neither of ours have shown any signs of wear, even after carrying them for 300 miles, taking them up and pulling them down 20+ times, and several nights of strong wind and heavy rain.
The only part that doesn’t look as good as new is a few of the pegs, three of which have noticeable bends in them after using them on hard, stony ground. They still work fine, but I’ll probably get longer, stronger ones to replace them at some point.
Size and weight

Like every single item of hiking gear that I have ever or will ever use, it’d be nice if the tent was a bit lighter. When sharing the load with another person, though, you’re only looking at about 1.2kg (2.6 pounds) each: that isn’t much more than even high-end ultralight one-person tents.
You could drop a bit of weight by leaving the footprint at home, but personally I wouldn’t: the extra 320 grams feels worth it to not end up with a hole in the floor or moisture seeping through from wet ground.
Being a supposedly three-person model, there’s no getting away from the physical size of the tent. At a drive-in campsite, you’ll have zero problems finding a space: looking at the enormous family-sized tents pitched alongside us some nights, ours seemed laughably small by comparison.
If you plan to wild-camp, though, or stay at very small, basic sites, finding enough flat ground to pitch on is a slightly bigger issue. Likewise, I carried the tent by strapping it horizontally to the bottom of my pack, and wouldn’t have wanted it any wider: as it was, it still sometimes caught on tree branches and narrow gates as I walked along.
Get regular travel, hiking, and tech updates from me
News, reviews, guides, and more, from here and around the web
Verdict

All in all, I was far more impressed by Naturehike’s Cloud Up 3 than I expected to be. I bought it expecting it to be little more than a way of finding out whether Lauren and I enjoyed camping together without spending a lot of money. I figured that if we did, we’d then splash the cash on a higher-end version that overcame a bunch of shortcomings.
Well, as it turns out, we love camping together…but we’ve got no plans to upgrade our tent. There are no signs of damage from sun, wind, or rain so far, and no major shortcomings either. It fits all of our requirements well enough that there’s really no need to buy anything else.
Is it perfect? No, it’s not. It’s too heavy to be considered a true ultralight tent yet still feels flimsy in strong winds, the pegs sacrifice sturdiness for weight, and the front, single-door design makes it near impossible to get in or out without disturbing whoever you’re camping with.
And yet, at least for how we’ve used it and plan to keep using it, none of that matters. It’s remarkably good value, opening up hike-in campsites and multiday hiking trips for the two of us for hundreds of dollars less than I expected we’d have to pay.
It’s fast and easy to pitch and pull down, has more than enough room for two people and their gear, keeps the rain out even when it’s pouring down, and has enough ventilation that both condensation and overheating haven’t been a problem so far.
It’s not the sort of thing you’d use for winter or high alpine camping, but we don’t camp in those conditions. At other times of year and in other places, at least when the wind isn’t howling, we’ll be more than happy to strap this tent onto our backpacks and head off into nature.
Given how much you get for how little you pay, it’s very hard to complain. And so I won’t. Highly recommended.